(Created page with "{{Crusader Walkthrough |name = The Marshal |image = 200px |totalplayer = 1 |mapname = - |gamemode = Military |allies = - |enemies = Roger Scabcoat<br>...") |
mNo edit summary Tag: Visual edit |
||
| Line 13: | Line 13: | ||
}}This is mission 5 in the [[Stronghold 3]] Blackstaff campaign. |
}}This is mission 5 in the [[Stronghold 3]] Blackstaff campaign. |
||
==Layout== |
==Layout== |
||
| − | The Rats have been chased away from [[Silverback]]'s former castle and they retreated to the safety of the Archbishop's Abbey, where the |
+ | The Rats have been chased away from [[Silverback]]'s former castle and they retreated to the safety of the Archbishop's Abbey, where the Marshal issues commands from. The three enemies entrenched themselves in a series of fortifications, which need to be fought through to put an end to the Brotherhood's tyranny once and for all. The Brotherhood will not put up an easy fight and will use any means necessary to remove you from power. |
This level is located on the border of a valley and highlands. The Abbey is in the northeastern island, which is connected to the mainland through a bridge. The northwest hides [[Greytail]]'s forts and multiple defense lines, from where two pathways lead out: one directly to the northwestern point of the low ground, and another snaking trail to a swampland in the bottom right, through [[Scabcoat]]'s settlement. A slope leads from the marshes to the eastern side of the valley, where you start. |
This level is located on the border of a valley and highlands. The Abbey is in the northeastern island, which is connected to the mainland through a bridge. The northwest hides [[Greytail]]'s forts and multiple defense lines, from where two pathways lead out: one directly to the northwestern point of the low ground, and another snaking trail to a swampland in the bottom right, through [[Scabcoat]]'s settlement. A slope leads from the marshes to the eastern side of the valley, where you start. |
||
| Line 47: | Line 47: | ||
After the wall, there is a junction of two walls. The outer wall with the round tower can be left alone, as you will be out of their range - just infiltrate and overpower the defenses! Wait until an attack has passed through so as to not suffer unnecessary losses. The walls will quickly fall and Greytail's rather humble fort will be in sight. Remove all archers in the towers and finish off any units in the interior. Greytail will be yours when all green units are removed around. |
After the wall, there is a junction of two walls. The outer wall with the round tower can be left alone, as you will be out of their range - just infiltrate and overpower the defenses! Wait until an attack has passed through so as to not suffer unnecessary losses. The walls will quickly fall and Greytail's rather humble fort will be in sight. Remove all archers in the towers and finish off any units in the interior. Greytail will be yours when all green units are removed around. |
||
| − | ==Breaking the |
+ | ==Breaking the Marshal== |
| − | Now comes the fun part. The |
+ | Now comes the fun part. The Marshal has surrounded his end of the bridge with numerous walls and he has an inner area fortified by a legion of monks and archers. He will not require siege engines to break, however he has considerable firepower. |
Move up the slope to cease any additional invasions. It is advised that you bring all of your troops through Scabcoat's territory and fill your numbers to maximum, so that you have an easier time working through his defenses. |
Move up the slope to cease any additional invasions. It is advised that you bring all of your troops through Scabcoat's territory and fill your numbers to maximum, so that you have an easier time working through his defenses. |
||
| Line 66: | Line 66: | ||
==The enemy attacks== |
==The enemy attacks== |
||
| − | All three enemies will spawn invasions until they are dealt with. The |
+ | All three enemies will spawn invasions until they are dealt with. The Marshal will cease invasions once your units are close to his encampment. |
*<u>'''Scabcoat'''</u> (yellow) favours light troops. He will send the smallest armies from the marshlands, usually with two compositions. He sends men-at-arms, archers and armed peasants. |
*<u>'''Scabcoat'''</u> (yellow) favours light troops. He will send the smallest armies from the marshlands, usually with two compositions. He sends men-at-arms, archers and armed peasants. |
||
*<u>'''Greytail'''</u> (green) spawns his invasions from his castle and tend to be the strongest out of all. He will send archers, men-at-arms and a few swordsmen, and erect a siege camp for two or three catapults. |
*<u>'''Greytail'''</u> (green) spawns his invasions from his castle and tend to be the strongest out of all. He will send archers, men-at-arms and a few swordsmen, and erect a siege camp for two or three catapults. |
||
| − | *<u>'''The |
+ | *<u>'''The Marshal'''</u> (teal) attacks rarely, although with a sizable army. Usually his army arrives after one of Greytail's attacks deploys. He spawns armies just behind Greytail's castle. He is fond of archers and [[pikemen]], and his catapults will roll all the way down, rarely constructed at a siege camp. |
{{SH3 Blackstaff Walkthrough}}__NOTOC__ |
{{SH3 Blackstaff Walkthrough}}__NOTOC__ |
||
Latest revision as of 16:50, 28 February 2020
This is mission 5 in the Stronghold 3 Blackstaff campaign.
Layout[]
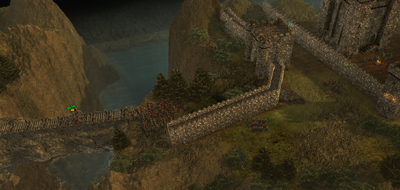
The Rats have been chased away from Silverback's former castle and they retreated to the safety of the Archbishop's Abbey, where the Marshal issues commands from. The three enemies entrenched themselves in a series of fortifications, which need to be fought through to put an end to the Brotherhood's tyranny once and for all. The Brotherhood will not put up an easy fight and will use any means necessary to remove you from power.
This level is located on the border of a valley and highlands. The Abbey is in the northeastern island, which is connected to the mainland through a bridge. The northwest hides Greytail's forts and multiple defense lines, from where two pathways lead out: one directly to the northwestern point of the low ground, and another snaking trail to a swampland in the bottom right, through Scabcoat's settlement. A slope leads from the marshes to the eastern side of the valley, where you start.
A circle of enemies[]
You gain control over a large estate that has ample resources and wide surface areas to cover. The keep is in a pretty open position, however you get a stuffed stockpile and granary to work with. 500 ale, 150 wheat and 150 candles are nothing to scoff at: enemy attacks will come soon enough and you need to get a working economy going quickly. All tech (except wells) are available to you to prevail, without the burden of a time limit.
Start by placing the stockpile somewhere near the forest in the west, and the granary close by. Build the barracks along the northern border and the armoury close to it and the stockpile, so that they become part of an imaginary wall line. Add a mill, two dairy farms and two bakeries. Build three wood camps to the forest to get wood. Erect three fletcher's workshops and two quarries with oxen. Buy the necessary wood for further hovels and buildings. Sell all pikes, metal armour, spears, pitch and candles. Add an artillator's workshop and armourer's workshop: you will need crossbowmen soon!
Initial defenses should contain checkpoints composed of single towers. In the east, erect a round tower and send all your starting men-at-arms there. In the north, it will be much harder to wall your settlement off: you will need to wait for stone to come in. You can add another round tower to this position. Start recruiting archers. Send the first 10 units to the eastern round tower, then set the rally point for new units on the top of the barracks and send all units on top of the northern round tower.
Facing the onslaughts[]
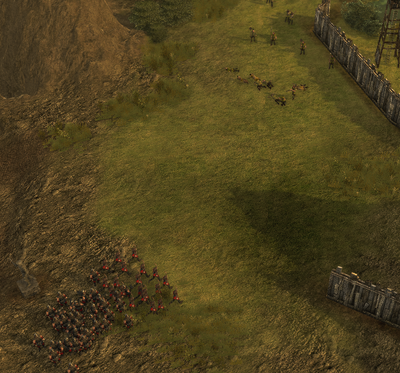
As first events, you get a healthy reserve of 20 monks! The first attack comes from Scabcoat relatively early, and he will send another one not long after from the southeast. His armies are not a threat, however make sure no unit slips through the hole. Try to complete the walls in this segment first, so any subsequent attack will become fruitless. Men-at-arms regain their thrown weapons fairly fast, so the small squads of enemies will perish. When you can spare the men, send an additional 10 archers to this place.
The other two enemies will come from the north with various armies. Usually Greytail will attack, however every so often the Brotherhood joins their ranks. Both parties like catapults, so prepare an engine tower with a ballista and focus those siege engines when they arrive in range! Archers in superior numbers will decimate the enemy ranged forces, however swordsmen are somewhat problematic to handle. Use the crossbowmen closest to the spots where they tend to attack. Keep the monks ready to battle any troop getting through your rudimentary defenses.
While this is underway, add additional quarries (to a total of 4) to skyrocket stone production. It costs a lot of stone to seal your castle, as the northern border is very curvy and ends near your stone deposits. You can add breweries and finally an inn to provide some small popularity. Add bakeries and breweries constantly and sell excess beer. Do not neglect popularity from food variety: add more dairy farms, apple farms and pig farms, as wood allows. Get ready to combat unwelcome events with adjusted rations. An apothecary will help against diseases.
Breakout[]
As soon as you gathered enough archers and crossbowmen, along with your walls completed, you can repel any coming invasion. You can add an engine tower with a mangonel on top to the stone deposit and the eastern walls, and fire away at any troop in range! You can soften up Scabcoat's encampment and the outer lines guarding the swampland entrance. Add positive Fear Factor to boost your unit health.
Gather archers and a backbone of melee troops (swordsmen and pikemen work well, however macemen are the fastest), favourably with catapults from your siege camp. When you are ready to move out against Scabcoat, send your troops to the way that has some statues. Draw stationary units with archers and mop up with your melee units. Scabcoat's occasional invasions will feed additional units, so be ready for them. Destroy any encountered woodwork.
The trail to Scabcoat's keep is fortified by some wooden pallisades. The first line mid-way up has some man traps: make sure you do not let any units stand on it for long! Destroying the walls they are connected to can shorten their uptime. A superior number of archers will be able to bulldoze through the scattered troops. When you reach the keep and control it, the Scribe will announce Scabcoat's capture and his attacks will cease. While you have conquered the estate, it will still remain hostile and any spawning peasants will aggro your units. Try to keep a small guard of archers there to eliminate the threat. Refill your numbers.
An uphill siege[]
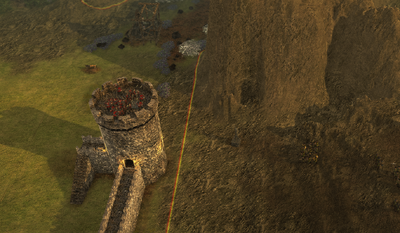
Greytail's encampment poses a much harder task due to his much developed lines. Both connection points are defended with multiple defense lines, towers, archers and gates. It is much better to attack from Scabcoat's encampment, because the round tower overlooking the southern passageway has numerous crossbowmen.
Slowly inch your way forward to the wall and send in some archers. The enemy archers will ignite pitch in front of the walls; be ready to pull back your troops. Once the fires are gone, move up and remove the defenders. Break the wall with catapults.
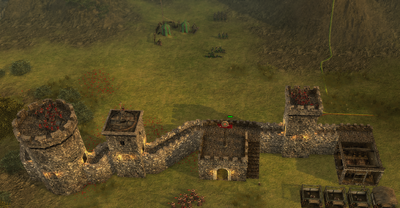
After the wall, there is a junction of two walls. The outer wall with the round tower can be left alone, as you will be out of their range - just infiltrate and overpower the defenses! Wait until an attack has passed through so as to not suffer unnecessary losses. The walls will quickly fall and Greytail's rather humble fort will be in sight. Remove all archers in the towers and finish off any units in the interior. Greytail will be yours when all green units are removed around.
Breaking the Marshal[]
Now comes the fun part. The Marshal has surrounded his end of the bridge with numerous walls and he has an inner area fortified by a legion of monks and archers. He will not require siege engines to break, however he has considerable firepower.
Move up the slope to cease any additional invasions. It is advised that you bring all of your troops through Scabcoat's territory and fill your numbers to maximum, so that you have an easier time working through his defenses.
Bring all units up close and clear the outside walls. Draw the warrior monks and remove them, then move in to the corner of the inside walls. Repeat the previous steps with the monks guarding the interior, then rush in with your melee troops! You do not need to kill the keep's guards, only to get to the top.
Mission and campaign accomplished!
The enemy attacks[]
All three enemies will spawn invasions until they are dealt with. The Marshal will cease invasions once your units are close to his encampment.
- Scabcoat (yellow) favours light troops. He will send the smallest armies from the marshlands, usually with two compositions. He sends men-at-arms, archers and armed peasants.
- Greytail (green) spawns his invasions from his castle and tend to be the strongest out of all. He will send archers, men-at-arms and a few swordsmen, and erect a siege camp for two or three catapults.
- The Marshal (teal) attacks rarely, although with a sizable army. Usually his army arrives after one of Greytail's attacks deploys. He spawns armies just behind Greytail's castle. He is fond of archers and pikemen, and his catapults will roll all the way down, rarely constructed at a siege camp.
Template:SH3 Blackstaff Walkthrough
